Most of time while working with ESP8266, we want to see the processed data, readings from sensors or other information. One of the ways of doing this is to print data to the serial monitor. It can be done if ESP8266 module is connected via USB to a PC. But there might be a cases when ESP8266 module isn't connected to the PC.
ESP-DASH is a library that allows to create a dashboard for ESP8266 and ESP32 modules. A dashboard can be accessed using the IP Address of the module.
This tutorial provides example how to create a dashboard using ESP-DASH for ESP8266 NodeMCU development board.
Components
| No. | Component | Quantity |
|---|---|---|
| 1. | ESP8266 NodeMCU + Micro USB cable | 1 |
Library
ESP-DASH library can be installed using PlatformIO from the command line.
pio project init --board nodemcuv2
pio lib install "ayushsharma82/ESP-DASH"
Project configuration file:
platformio.ini
[env:nodemcuv2]
platform = espressif8266
board = nodemcuv2
framework = arduino
lib_deps = ayushsharma82/ESP-DASH@^3.0
Code
We create an instance of AsyncWebServer class that allows to run async HTTP and WebSocket server. Also we create an instance of ESPDash that handles the networking part of dashboard.
ESP-DASH is based on cards (UI components). We add two cards to the dashboard: generic card that will be used to display the number and toogle button.
In the setup function we initialize serial communication and connect to a Wi-Fi network. After successful connection, IP address of the ESP8266 is printed to the serial port. Server is started with begin method.
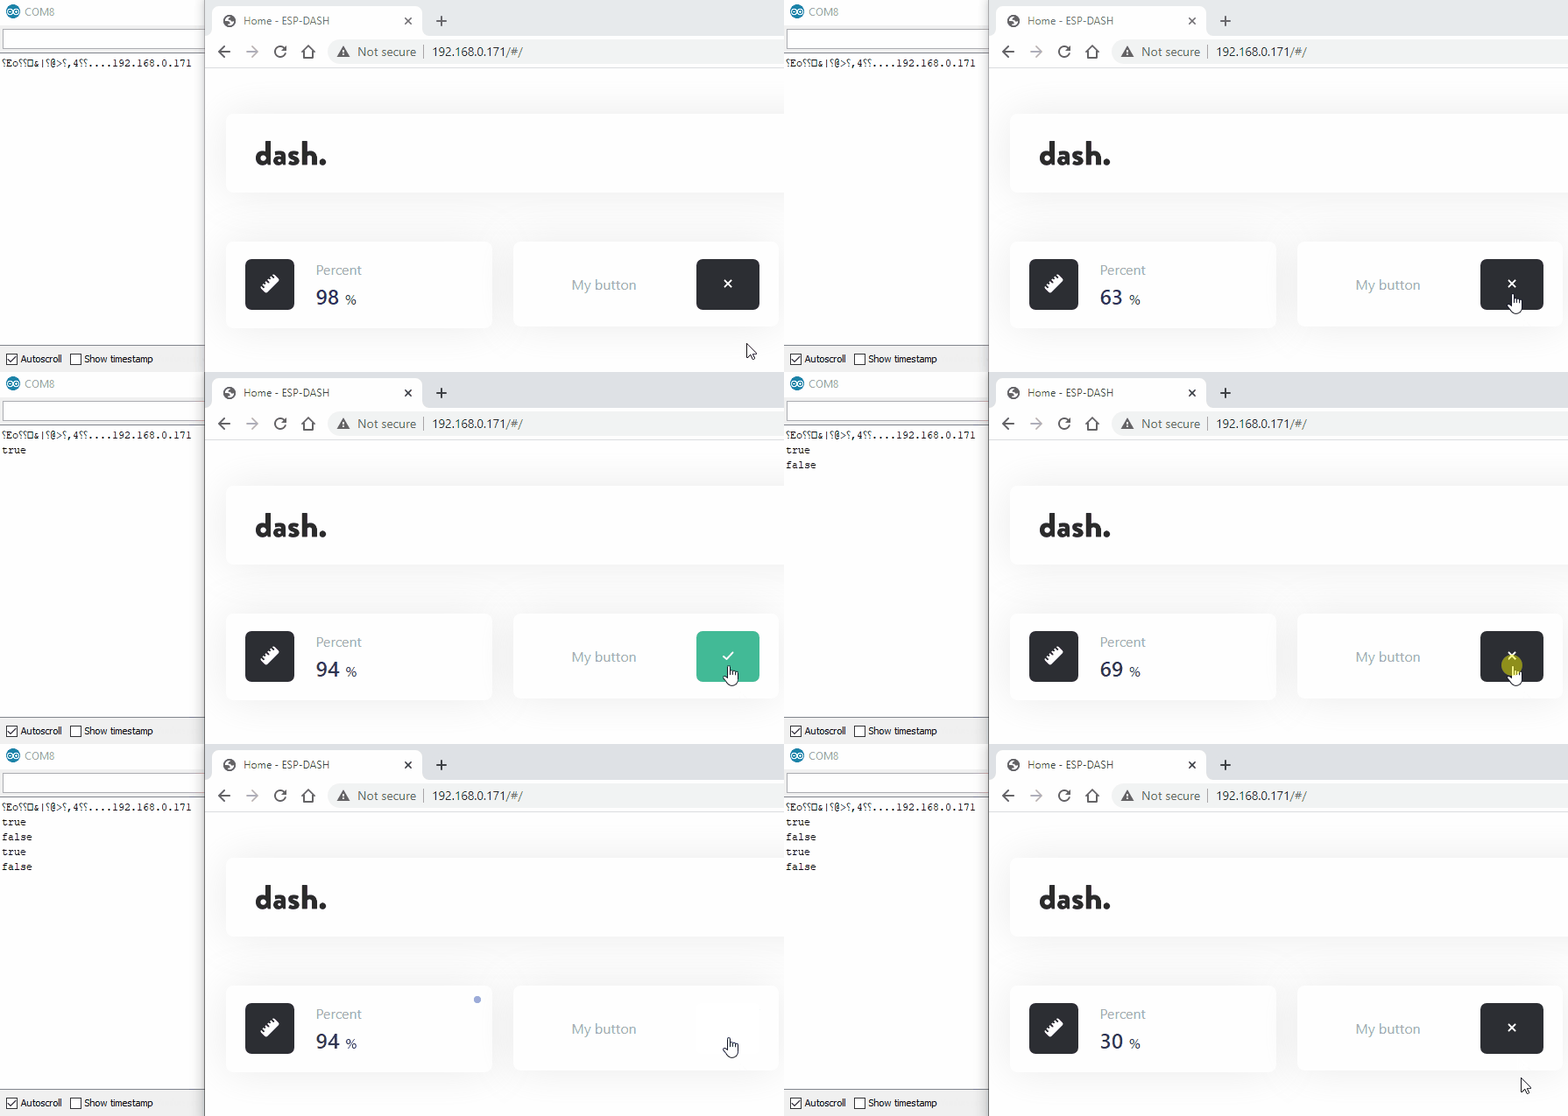
In the loop function we update card with random number from 1 to 100 (inclusive). We attach a callback function to the button which will be called when button is clicked on the dashboard. Button has two states: true or false. If button state is true, then clicking this button on the dashboard will trigger a callback function with argument false. The sendUpdates method is used to update card values on the dashboard.
src/main.cpp
#include <Arduino.h>
#include <ESP8266WiFi.h>
#include <ESPAsyncWebServer.h>
#include <ESPDash.h>

const char *WIFI_SSID = "YOUR WIFI NETWORK NAME";
const char *WIFI_PASSWORD = "YOUR WIFI PASSWORD";

AsyncWebServer server(80);
ESPDash dashboard(&server);

Card percentCard(&dashboard, GENERIC_CARD, "Percent", "%");
Card button(&dashboard, BUTTON_CARD, "My button");

void setup()
{
    Serial.begin(9600);

    WiFi.begin(WIFI_SSID, WIFI_PASSWORD);
    while (WiFi.status() != WL_CONNECTED) {
        delay(500);
        Serial.print(".");
    }

    Serial.println(WiFi.localIP());

    server.begin();
}

void loop()
{
    percentCard.update((int) random(1, 101));

    button.attachCallback([&](bool value) {
        Serial.println(value ? "true" : "false");
        button.update(value);
        dashboard.sendUpdates();
    });

    dashboard.sendUpdates();
    delay(1000);
}
Build project
Run the following command to build project and upload program to the ESP8266 NodeMCU:
pio run --target uploadTesting
Open a browser and access the dashboard via IP address of ESP8266 NodeMCU.


Leave a Comment
Cancel reply