NEO-6M is GPS module that allows to get raw GPS data in NMEA format. The raw data needs to parsed to obtain GPS information such as location coordinates (latitude and longitude), altitude, speed, date and time in UTC, etc. NEO-6M module supports serial communication that enables to communicate with microcontroller. The default baud rate is 9600. This module comes with external antenna which can be attached to U.FL connector on the module.
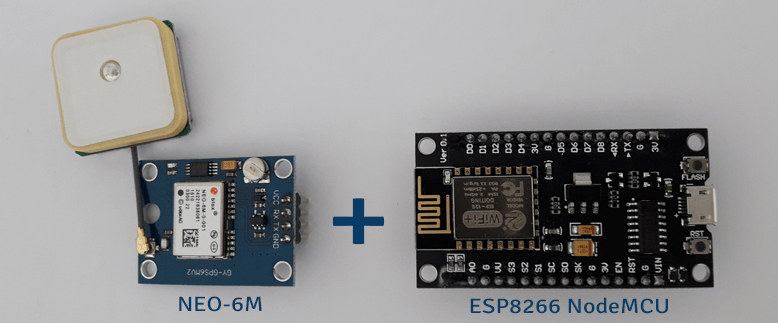
This tutorial shows how to interface NEO-6M GPS module with ESP8266 NodeMCU development board.
Components
| No. | Component | Quantity |
|---|---|---|
| 1. | ESP8266 NodeMCU + Micro USB cable | 1 |
| 2. | NEO-6M GPS module | 1 |
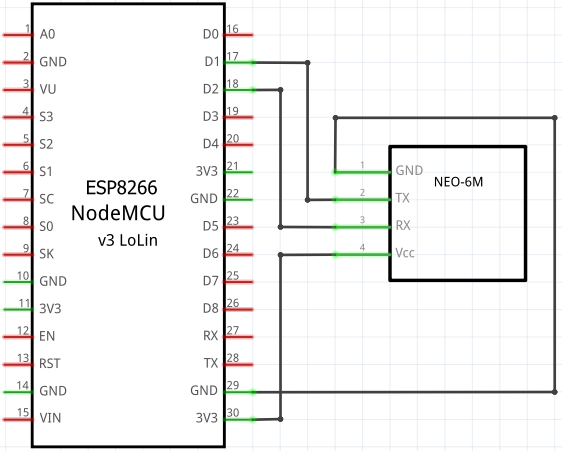
Circuit diagram
TX pin of NEO-6M GPS module is connected to the D1 pin on the NodeMCU board and RX pin is connected to the D2 pin.
Libraries
We will use TinyGPSPlus library which parses GPS data in NMEA format and extracts information such as latitude, longitude, altitude, etc. To enable serial communication on D1 and D2 pins of the NodeMCU board we will use EspSoftwareSerial library.
Libraries can be installed using PlatformIO from the command line.
pio project init --board nodemcuv2
pio lib install "mikalhart/TinyGPSPlus"
pio lib install "plerup/EspSoftwareSerial@6.9"
Project configuration file:
platformio.ini
[env:nodemcuv2]
platform = espressif8266
board = nodemcuv2
framework = arduino
lib_deps =
    mikalhart/TinyGPSPlus@^1.0
    plerup/EspSoftwareSerial@6.9
Code
The D1 and D2 pins of the NodeMCU board will be used as RX and TX pins for serial communication with the NEO-6M GPS module.
In the setup function, we initialize serial communication to send data to a PC and communicate with the NEO-6M module.
In the loop function, we repeatedly checking if the GPS data is available. If so, NodeMCU reads raw data from NEO-6M module. Data is parsed and GPS information is printed to the serial port.
src/main.cpp
#include <Arduino.h>
#include <TinyGPS++.h>
#include <SoftwareSerial.h>

TinyGPSPlus gps;
SoftwareSerial gpsSerial(D1, D2); // RX, TX
char buffer[100];

void printData()
{
    if (gps.location.isUpdated()) {
        double lat = gps.location.lat();
        double lng = gps.location.lng();

        double altitude = gps.altitude.meters();

        int year = gps.date.year();
        int month = gps.date.month();
        int day = gps.date.day();

        int hour = gps.time.hour();
        int minute = gps.time.minute();
        int second = gps.time.second();

        snprintf(buffer, sizeof(buffer),
                 "Latitude: %.8f, Longitude: %.8f, Altitude: %.2f m, "
                 "Date/Time: %d-%02d-%02d %02d:%02d:%02d",
                 lat, lng, altitude, year, month, day, hour, minute, second);

        Serial.println(buffer);
    }
}

void setup()
{
    Serial.begin(9600);
    gpsSerial.begin(9600);
}

void loop()
{
    while (gpsSerial.available() > 0) {
        if (gps.encode(gpsSerial.read())) {
            printData();
        }
    }
}
Build project
Run the following command to build project and upload program to the ESP8266 NodeMCU:
pio run --target uploadTesting
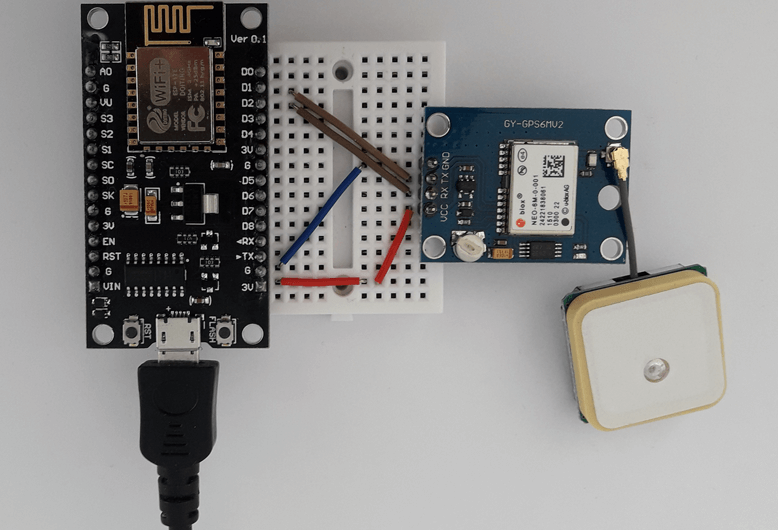
Circuit is designed on a breadboard. NodeMCU is connected via USB to a PC. When NEO-6M module is connected to GPS satellites, LED on the module starts blinking.
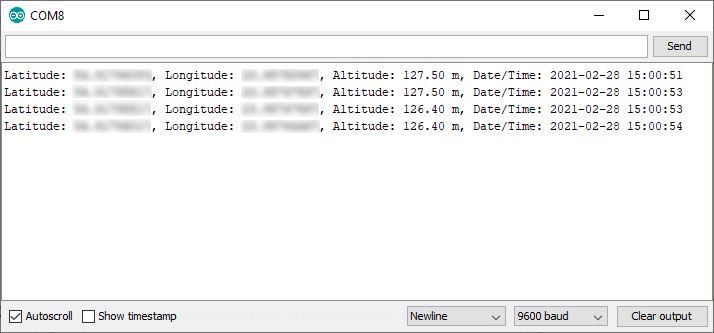
NodeMCU prints GPS information to the serial port. Here is example how output looks on the Serial Monitor:


Leave a Comment
Cancel reply