
The bandwhich is a command line tool for monitoring network bandwidth. This tool listens to the network traffic on a given interface and prints bandwidth usage by process, connection and remote address.
This tutorial demonstrates how to install bandwhich on Ubuntu 20.04.
Install bandwhich
Get the latest version tag of bandwhich release from GitHub. Assign version tag to variable.
BANDWHICH_VERSION=$(curl -s "https://api.github.com/repos/imsnif/bandwhich/releases/latest" | grep -Po '"tag_name": "\K[0-9.]+')Download tar.gz file from releases page of the bandwhich repository.
curl -Lo bandwhich.tar.gz "https://github.com/imsnif/bandwhich/releases/latest/download/bandwhich-v${BANDWHICH_VERSION}-x86_64-unknown-linux-musl.tar.gz"Run the following command to extract a tar.gz file to /usr/local/bin directory:
sudo tar xf bandwhich.tar.gz -C /usr/local/binNow bandwhich command will be available for all users as system-wide command.
We can check bandwhich version:
bandwhich --versionRemove unnecessary file:
rm -rf bandwhich.tar.gzTesting bandwhich
Run bandwhich command without any arguments to listen on default network interface:
sudo bandwhichYou can get a list of all available network interfaces as follows:
ip addr showThe -i option can used to monitor a given network interface.
sudo bandwhich -i ens33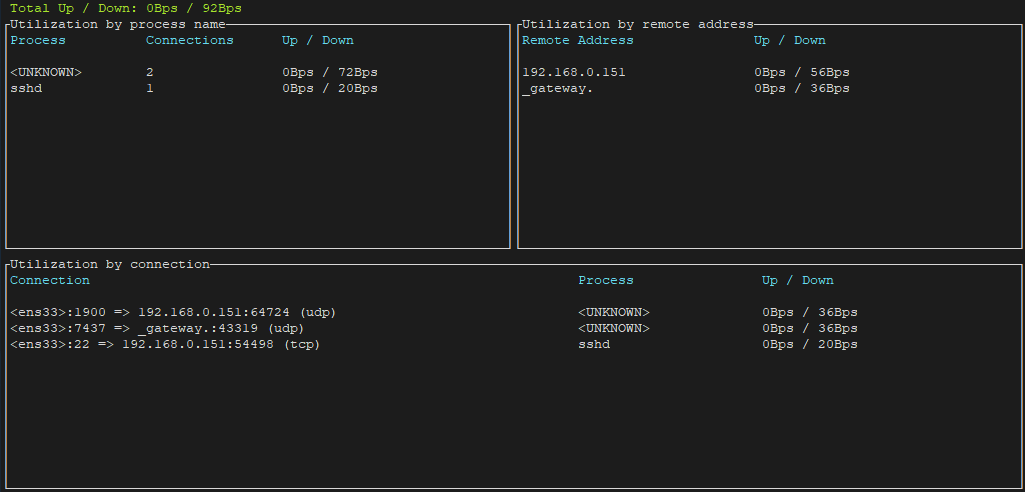
Press CTRL+C to quit bandwhich.
Uninstall bandwhich
If you want to completely remove bandwhich, delete executable file:
sudo rm -rf /usr/local/bin/bandwhich


Leave a Comment
Cancel reply