
OpenCV offers functionality for drawing various geometric shapes such as line, rectangle, circle, etc.
The rectangle function can be used to draw a rectangle by specifying x and y coordinates for top-left and bottom-right corner.
import cv2
import numpy as np

img = np.zeros((100, 300, 3), dtype=np.uint8)

x1, y1 = 50, 20
x2, y2 = 250, 80
color = (0, 255, 0)
thickness = 2
cv2.rectangle(img, (x1, y1), (x2, y2), color, thickness)

cv2.imshow('Image', img)
cv2.waitKey(0)
cv2.destroyAllWindows()
#include <opencv2/opencv.hpp>
using namespace cv;
int main()
{
Mat img = Mat::zeros(100, 300, CV_8UC3);
int x1 = 50, y1 = 20;
int x2 = 250, y2 = 80;
Scalar color(0, 255, 0);
int thickness = 2;
rectangle(img, Point(x1, y1), Point(x2, y2), color, thickness);
imshow("Image", img);
waitKey(0);
destroyAllWindows();
return 0;
}package app;
import org.opencv.core.*;
import org.opencv.highgui.HighGui;
import org.opencv.imgproc.Imgproc;
public class Main
{
static { System.loadLibrary(Core.NATIVE_LIBRARY_NAME); }
public static void main(String[] args)
{
Mat img = Mat.zeros(100, 300, CvType.CV_8UC3);
int x1 = 50, y1 = 20;
int x2 = 250, y2 = 80;
Scalar color = new Scalar(0, 255, 0);
int thickness = 2;
Imgproc.rectangle(img, new Point(x1, y1), new Point(x2, y2), color, thickness);
HighGui.imshow("Image", img);
HighGui.waitKey(0);
HighGui.destroyAllWindows();
System.exit(0);
}
}Result:
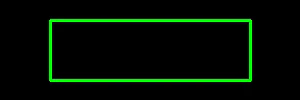
For convenience, the rectangle function also accepts x and y coordinates of the top-left corner and width and height. It is an alternative way to draw a rectangle.
import cv2
import numpy as np

img = np.zeros((100, 300, 3), dtype=np.uint8)

x, y = 50, 20
w, h = 200, 60
color = (0, 255, 0)
thickness = 2
cv2.rectangle(img, (x, y, w, h), color, thickness)

cv2.imshow('Image', img)
cv2.waitKey(0)
cv2.destroyAllWindows()
#include <opencv2/opencv.hpp>
using namespace cv;
int main()
{
Mat img = Mat::zeros(100, 300, CV_8UC3);
int x = 50, y = 20;
int w = 200, h = 60;
Scalar color(0, 255, 0);
int thickness = 2;
rectangle(img, Rect(x, y, w, h), color, thickness);
imshow("Image", img);
waitKey(0);
destroyAllWindows();
return 0;
}package app;
import org.opencv.core.*;
import org.opencv.highgui.HighGui;
import org.opencv.imgproc.Imgproc;
public class Main
{
static { System.loadLibrary(Core.NATIVE_LIBRARY_NAME); }
public static void main(String[] args)
{
Mat img = Mat.zeros(100, 300, CvType.CV_8UC3);
int x = 50, y = 20;
int w = 200, h = 60;
Scalar color = new Scalar(0, 255, 0);
int thickness = 2;
Imgproc.rectangle(img, new Rect(x, y, w, h), color, thickness);
HighGui.imshow("Image", img);
HighGui.waitKey(0);
HighGui.destroyAllWindows();
System.exit(0);
}
}


Leave a Comment
Cancel reply