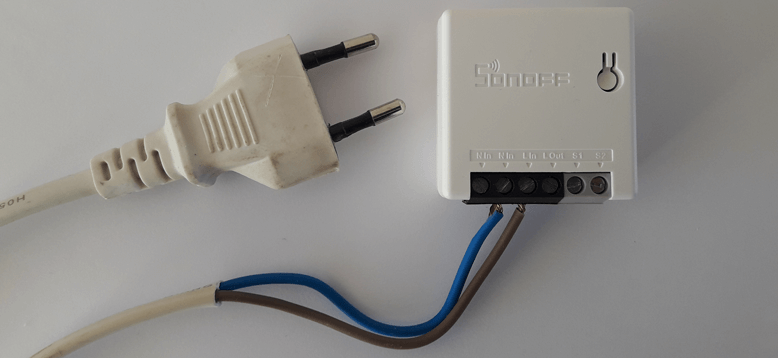
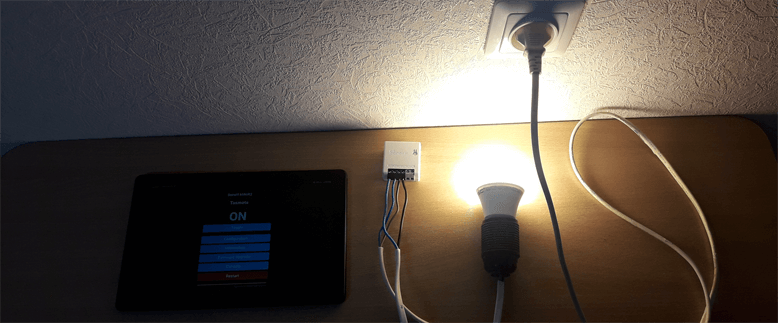
Sonoff MINIR2 is a compact switch that has integrated ESP8266 Wi-Fi module. MINIR2 can be installed into switch box to remotely turn on and off appliances.
This tutorial explains to flash the Tasmota firmware on a Sonoff MINIR2 switch over-the-air (OTA).
Requirements
By default, ITEAD firmware is installed on Sonoff MINIR2. Make sure firmware version is 3.5 or higher. You can check version with eWeLink app. It also can be used to upgrade firmware.
Notes
- After flashing the Tasmota firmware on a Sonoff MINIR2 switch, it is not possible to revert to the original ITEAD firmware.
- You will work with high voltage. Please make sure you disconnected MINIR2 from mains power when dealing with the device.
Powering a device
Sonoff MINIR2 needs to be wired to mains power (110 - 220 V AC). Connect live wire to LIn and neutral wire to NIn.

Enable DIY mode
Sonoff MINIR2 can work in DIY mode. In this mode device can be controlled by HTTP POST requests. There is API method that allows to flash desired firmware on device.
Follow the following steps to enable DIY mode:
- Power on Sonoff MINIR2 by connecting it to the mains power.
- Long press the button for 5 seconds to enter compatible pairing mode. Note: light blue LED will blink continuously.
- MINIR2 will create a wireless access point named
ITEAD-XXXXXXXXXX. Connect to it using laptop or mobile device. Password is12345678. - Open a web browser and navigate to
http://10.10.7.1address. - Provide Wi-Fi SSID and password to connect MINIR2 to local network.
When device successfully connected to network, the device is in DIY mode.
Find device IP address
You can find IP address of Sonoff MINIR2 by using one of the following ways:
- Using router's web interface.
- Using local network scanning application on PC or mobile device.
- Using
nmapcommand. You can read post how to find all devices connected to local network using Nmap.
Flash the Tasmota firmware
We can flash the Tasmota firmware on a Sonoff MINIR2 by using HTTP POST requests. We will use curl command to send requests. Alternatively, you can use Postman or similar application.
Open terminal and follow these steps:
- Assign an IP address of MINIR2 to variable:
set IP_ADDRESS=192.168.0.166IP_ADDRESS=192.168.0.166- Get device information to check if DIY mode is working fine:
curl -X POST -d "{\"data\":{}}" http://%IP_ADDRESS%:8081/zeroconf/infocurl -X POST -d "{\"data\":{}}" http://$IP_ADDRESS:8081/zeroconf/infoYou will get response something like this:
{
  "seq": 3,
  "error": 0,
  "data": {
    "switch": "off",
    "startup": "off",
    "pulse": "off",
    "pulseWidth": 500,
    "ssid": "XXXXXXX",
    "otaUnlock": false,
    "fwVersion": "3.6.0",
    "deviceid": "XXXXXXXXXX",
    "bssid": "XX:XX:XX:XX:XX:XX",
    "signalStrength": -58
  }
}
The fwVersion parameter specifies ITEAD firmware version. It should be 3.5 or higher.
The otaUnlock parameter defines if we can flash custom firmware over-the-air (OTA). We need to unlock this feature if otaUnlock is equals to false.
- Unlock OTA:
curl -X POST -d "{\"data\":{}}" http://%IP_ADDRESS%:8081/zeroconf/ota_unlockcurl -X POST -d "{\"data\":{}}" http://$IP_ADDRESS:8081/zeroconf/ota_unlockYou will get response:
{
  "seq": 3,
  "error": 0
}- Verify that OTA is unlocked:
curl -X POST -d "{\"data\":{}}" http://%IP_ADDRESS%:8081/zeroconf/infocurl -X POST -d "{\"data\":{}}" http://$IP_ADDRESS:8081/zeroconf/infoYou should get response which contains otaUnlock parameter set to true:
{
  "seq": 4,
  "error": 0,
  "data": {
    ...
    "otaUnlock": true,
    ...
  }
}
We need the download address of the Tasmota firmware and SHA256 checksum (hash) of the firmware. There are an existing server that provides links for downloading Tasmota firmware. This server also provides precalculated SHA256 checksum for firmware file.
- Assign SHA256 checksum to variable:
for /F %H in ('curl -s http://sonoff-ota.aelius.com/tasmota-latest-lite.bin.sha256') do set HASH=%HHASH=$(curl -s http://sonoff-ota.aelius.com/tasmota-latest-lite.bin.sha256 | cut -d ' ' -f 1)The maximum size for uploading firmware should be 508 KB. So we will use Tasmota Lite version.
- Flash the latest Tasmota firmware on a Sonoff MINIR2:
curl -X POST -d "{\"data\":{\"downloadUrl\":\"http://sonoff-ota.aelius.com/tasmota-latest-lite.bin\",\"sha256sum\":\"%HASH%\"}}" http://%IP_ADDRESS%:8081/zeroconf/ota_flashcurl -X POST -d "{\"data\":{\"downloadUrl\":\"http://sonoff-ota.aelius.com/tasmota-latest-lite.bin\",\"sha256sum\":\"$HASH\"}}" http://$IP_ADDRESS:8081/zeroconf/ota_flashYou will get response:
{
  "seq": 4,
  "error": 0
}
Now you should wait for about 5 minutes. When process done, Tasmota will create a wireless access point named tasmota_XXXXXX-XXXX.
Device recovery
If tasmota_XXXXXX-XXXX access point not appeared after 5 minutes or more, then we need to recover device using fast power cycle technique. If you see tasmota_XXXXXX-XXXX then go to next section.
Follow the following steps to recover device:
- Disconnect MINIR2 from mains power for about 10 seconds.
- Apply power to MINIR2 and wait for about 20 seconds.
- Power off MINIR2, wait for about 2 seconds until the blue LED turns off, power on MINIR2, wait for about 2 seconds until the blue LED turns on. Repeat this process six times and leave device on after seventh time.
- Check
tasmota_XXXXXX-XXXXaccess point. If you see it then go to next section. If not, then try to repeat recovery process.
Tasmota Wi-Fi configuration
We can use Tasmota web interface to connect MINIR2 to local network. Follow the following steps:
- Using laptop or mobile device connect to
tasmota_XXXXXX-XXXXwireless access point. - Open a web browser and navigate to
http://192.168.4.1address. - Enter Wi-Fi SSID and password. Click "Save" button to apply settings. The MINIR2 will try to connect to the local network. If it was successful, you will get message "Configuration saved".
- The
tasmota_XXXXXX-XXXXwill disapear. Connect laptop or mobile device to your local network. - Open the IP address of MINIR2 with web browser. Now you have full access to Tasmota.
Note: I also needed reconnect mains power for MINIR2 and restart router in order to access Tasmota web interface via browser.
Set template in Tasmota
We should to set MINIR2 template using Tasmota web interface. Template defines how GPIOs should be assigned to the components of a device. Follow these steps:
- Access the Tasmota web interface by using IP address of MINIR2.
- Go to "Configuration" and then "Configure Other".
- Provide the template in "Template" field:
{"NAME":"Sonoff MINIR2","GPIO":[32,0,0,0,160,0,0,0,224,320,0,0,0,0],"FLAG":0,"BASE":1}- Check "Activate" box and click "Save" button.
- Once device rebooted, you will see "Sonoff MINIR2" at the top of the page. Now you can turn on and off relay with "Toggle" button.
Upgrade Tasmota firmware
If you want to update Tasmota firmware to latest version or upgrade from Lite to Full version, follow the following steps:
- Download Tasmota firmware:
curl -so tasmota.bin.gz http://ota.tasmota.com/tasmota/release/tasmota.bin.gz- Access the Tasmota web interface by using IP address of MINIR2.
- Go to "Firmware Upgrade".
- In the "Upgrade by file upload" section, choose a downloaded
tasmota.bin.gzfile and click "Start upgrade". - Once the firmware upgrade is finished you can reconnect back to the web interface and check the firmware version by clicking "Information" button.


The 10 Comments Found
This procedure work no longer. After sending command to download and install from
http://sonoff-ota.aelius.com/tasmota-latest-lite.bin
then command {"seq":4, "error":0} appears
and after freeze.
May be a problem with the link, as I've found on github:
https://github.com/njh/sonoff-ota-flash-cli/issues/10
The tasmota-latest-lite.bin file can be downloaded from sonoff-ota.aelius.com again because the server has back to live.
Works great! Pay attention to the "wait 5 minutes" after flashing. It looks like it doesn't work but it really does.
It works like a charm although I got a different value for 'seq' after the unlock command.
Maybe update the Tasmota Lite file, it's still 9.5.0 and latest is 12.2.0
Hi,
I'm not managing sonoff-ota.aelius.com site. You can read 'Upgrade Tasmota firmware' section in the post.
Thanks! Works great!
Awesome procedure for Windows users! Thanks heaps worked a treat
Thanks for the guide. I found this blog late after I had manually configured the template in Tasmota 12.5.0. Mine config looks slightly different:
Thanks for this procedure ! Do you know where can I find the original firmware for MINI R2 ?
I don't have that information. You might try checking the manufacturer's official website or contacting their customer support for assistance.
Leave a Comment
Cancel reply