
Cloud Commander is a web-based file manager that allows users to manage files on remote servers and local machines through a web browser interface. It is designed to provide an easy and convenient way to handle file operations such as copying, moving, deleting, and editing files.
This tutorial explains how to install Cloud Commander inside a Docker container on Linux. Commands have been tested on Ubuntu.
Prepare environment
Make sure you have installed Docker in your system. If you are using Ubuntu, installation instructions can be found in the post.
Install Cloud Commander
- Host network
Run the following command to create a container for Cloud Commander that uses host network:
docker run -d --name=cloudcmd --restart=always --network=host \
    -v ~:/root \
    -v /:/mnt/fs \
coderaiser/cloudcmd- User-defined bridge network
User-defined bridge network can be used for listening on different port. By default, Cloud Commander service is listening on port 8000. It can be changed with -p option.
docker network create app-netdocker run -d --name=cloudcmd --restart=always --network=app-net \
-p 8080:8000 \
-v ~:/root \
-v /:/mnt/fs \
coderaiser/cloudcmdTesting Cloud Commander
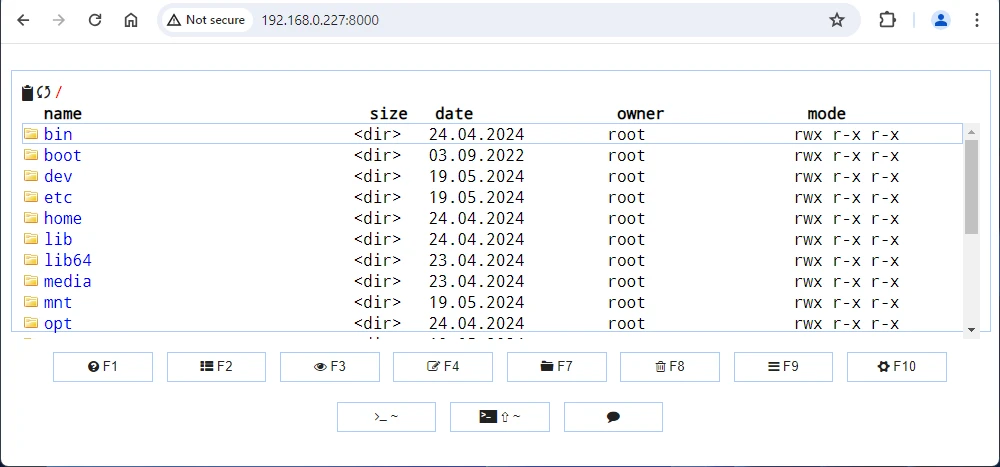
To access a web UI, go to http://<IP_ADDRESS>:8000, where <IP_ADDRESS> is the IP address of the system.
Uninstall Cloud Commander
To completely remove Cloud Commander, remove its container:
docker rm --force cloudcmdRemove Cloud Commander image:
docker rmi coderaiser/cloudcmdIf a user-defined bridge network was created, you can delete it as follows:
docker network rm app-net


Leave a Comment
Cancel reply