
Dust is a command line tool which allows to view and analyze disk space usage. This tool can be used as an alternative to the du command.
This tutorial explains demonstrates how to install Dust on Ubuntu 20.04.
Install Dust
Execute the following command to get the latest version tag of Dust release and assign it to variable:
DUST_VERSION=$(curl -s "https://api.github.com/repos/bootandy/dust/releases/latest" | grep -Po '"tag_name": "v\K[0-9.]+')Download tar.gz file from releases page of the Dust repository.
curl -Lo dust.tar.gz "https://github.com/bootandy/dust/releases/latest/download/dust-v${DUST_VERSION}-x86_64-unknown-linux-gnu.tar.gz"Create temporary directory and extract a tar.gz file:
mkdir dust-temp
tar xf dust.tar.gz --strip-components=1 -C dust-temp
Move executable file to /usr/local/bin directory.
sudo mv dust-temp/dust /usr/local/binNow dust command can be used for all users as system-wide command.
We can check Dust version:
dust --versionRemove tar.gz file and temporary directory:
rm -rf dust.tar.gz
rm -rf dust-temp
Testing Dust
Run dust command without any arguments to see disk space usage in the current working directory.
dustDisk space usage of a particular directory can be viewed by specifying directory path as argument. For example, we can analyze /usr/local directory as follows:
sudo dust /usr/local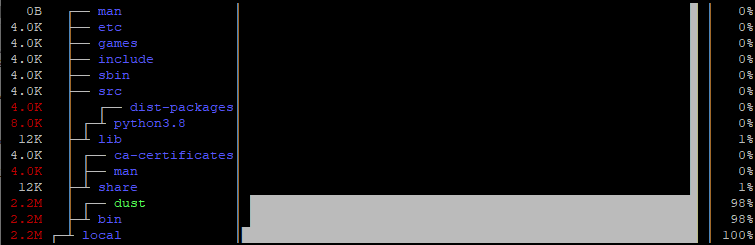
Uninstall Dust
If you want to completely remove Dust, delete executable file:
sudo rm -rf /usr/local/bin/dust

Leave a Comment
Cancel reply