The micro is a text editor that allows to create and modify text files via command line. It supports syntax highlighting, line numbers, common keybindings (CTRL+C, CTRL+V, …), undo/redo, text selection with mouse and other features. The micro is packaged as a single static binary with everything included in it. Only need to download and use it. The micro is written using Go programming language.
This tutorial shows how to install micro text editor on Raspberry Pi.
Install micro
Use SSH to connect to Raspberry Pi. Get the latest version tag of micro release from GitHub. Assign version tag to variable.
MICRO_VERSION=$(curl -s "https://api.github.com/repos/zyedidia/micro/releases/latest" | grep -Po '"tag_name": "v\K[0-9.]+')Navigate to your home directory. Download the tar.gz file from releases page of the micro repository and extract it.
cd ~
curl -Lo micro.tar.gz "https://github.com/zyedidia/micro/releases/latest/download/micro-${MICRO_VERSION}-linux-arm.tar.gz"
tar xf micro.tar.gz
Move binary file to the /usr/local/bin directory.
sudo mv "micro-${MICRO_VERSION}/micro" /usr/local/binNow micro can be used for all users as system-wide command. We can check version:
micro -versionInstallation is completed and we can remove unnecessary files:
rm -rf micro.tar.gz
rm -rf "micro-${MICRO_VERSION}"
Testing micro
To create a new file or edit an existing file, run micro command and provide a filename as argument:
micro test.txtPress CTRL+S if you want to save a file. Press CTRL+Q to quit micro.
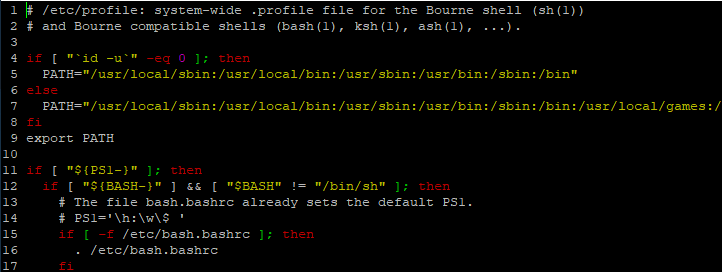
Execute the command as superuser if you don't have required permissions to edit a file.
sudo micro /etc/profile
Uninstall micro
If you wish to remove micro, just delete related binary file:
sudo rm -rf /usr/local/bin/micro


Leave a Comment
Cancel reply