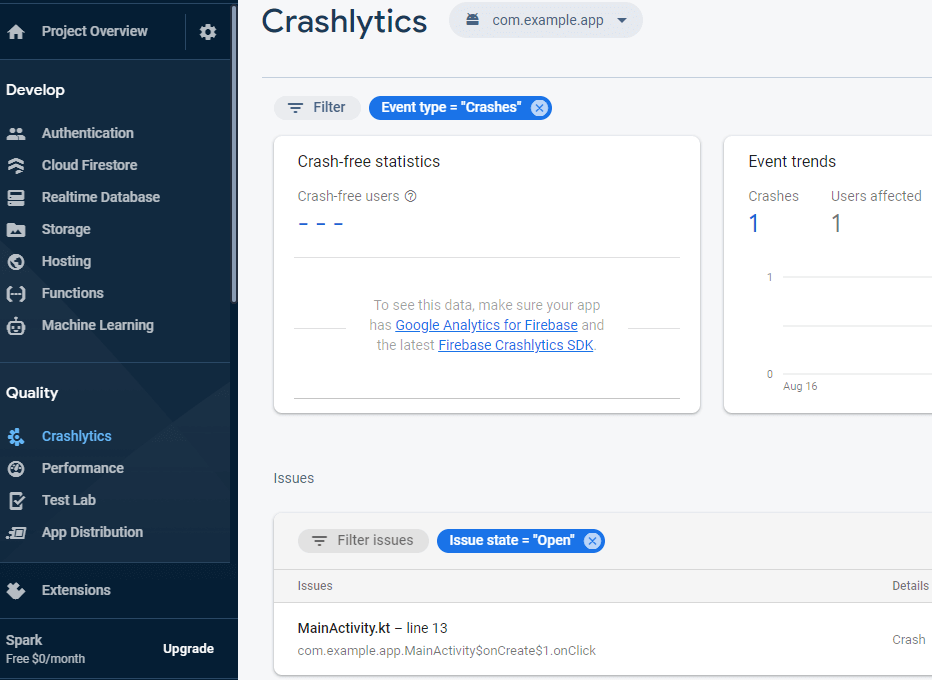
Firebase Crashlytics is a crash reporter that can be integrated into Android application. It allows tracking, collect, and organize application crashes. We can analyze crash reports in the Firebase dashboard.
In order to use the Firebase Crashlytics we need to create a Firebase project. It can be done by following these steps:
- Login to the Firebase Console.
- Click "Add project".
- Provide project name and click "Continue".
- In the next screen, make sure "Enable Google Analytics for this project" is selected. It is used by Firebase Crashlytics to compute crash-free users and other statistics.
- Select existing Google Analytics account or create a new account.
- Click "Create project".
- When project was created click the Android icon.
- Provide Android package name. It can be found in the
AndroidManifest.xmlfile (example:com.example.app). - Click "Register app".
- Download the
google-service.jsonfile and add into theappdirectory. - Click "Next". When a new tab appears click "Next" again.
- Skip verification process by clicking "Skip this step".
- In the left-hand navigation panel click "Crashlytics".
- Click "Enable Crashlytics".
We need to add Google services plugin for Gradle to project-level build.gradle file. This plugin process the google-services.json file and generates resources that can be used in the code.
Also, we need to add the Crashlytics Gradle plugin.
build.gradle
buildscript {
    // Other configuration

    dependencies {
        // ...
        classpath 'com.google.gms:google-services:4.3.3'
        classpath 'com.google.firebase:firebase-crashlytics-gradle:2.2.0'
    }
}
In the module’s build.gradle file, we need to apply newly added Gradle plugins. Also, we need to add firebase-crashlytics dependency.
app/build.gradle
apply plugin: 'com.android.application'
// ...
apply plugin: 'com.google.gms.google-services'
apply plugin: 'com.google.firebase.crashlytics'

android {
    // ...
}

dependencies {
    // Other dependencies
    // ...
    implementation 'com.google.firebase:firebase-crashlytics:17.2.1'
}
In the layout XML file we added Button which will used to simulate application crash.
app/src/main/res/layout/activity_main.xml
<?xml version="1.0" encoding="utf-8"?>
<RelativeLayout xmlns:android="http://schemas.android.com/apk/res/android"
    xmlns:tools="http://schemas.android.com/tools"
    android:layout_width="match_parent"
    android:layout_height="match_parent"
    tools:context=".MainActivity">

    <Button
        android:id="@+id/myButton"
        android:layout_width="wrap_content"
        android:layout_height="wrap_content"
        android:layout_centerInParent="true"
        android:text="Make crash" />

</RelativeLayout>
To test application crash, we added a code that divide a number by zero.
app/src/main/java/com/example/app/MainActivity.kt
package com.example.app

import androidx.appcompat.app.AppCompatActivity
import android.os.Bundle
import kotlinx.android.synthetic.main.activity_main.*

class MainActivity : AppCompatActivity()
{
    override fun onCreate(savedInstanceState: Bundle?)
    {
        super.onCreate(savedInstanceState)
        setContentView(R.layout.activity_main)
        myButton.setOnClickListener { 1 / 0 }
    }
}
Now run the application and check the logcat output. If Firebase Crashlytics integration was successful, output should contain the following messages:
I/FirebaseCrashlytics: Initializing Crashlytics 17.2.1
I/FirebaseInitProvider: FirebaseApp initialization successful
Click a button and check the logcat output for a message:
D/TransportRuntime.SQLiteEventStore: Storing event with priority=HIGHEST, name=FIREBASE_CRASHLYTICS_REPORT for destination cctRun application again. Open browser and refresh the Firebase dashboard. Now we can see the crash which occurred by pressing a button.


Leave a Comment
Cancel reply