Raspberry Pi Pico board allows to control an external LEDs through GPIO pins. This tutorial provides circuit diagram and code how to blink the external LED using Raspberry Pi Pico.
Components
| No. | Component | Quantity |
|---|---|---|
| 1. | Raspberry Pi Pico | 1 |
| 2. | 330Ω resistor | 1 |
| 3. | LED | 1 |
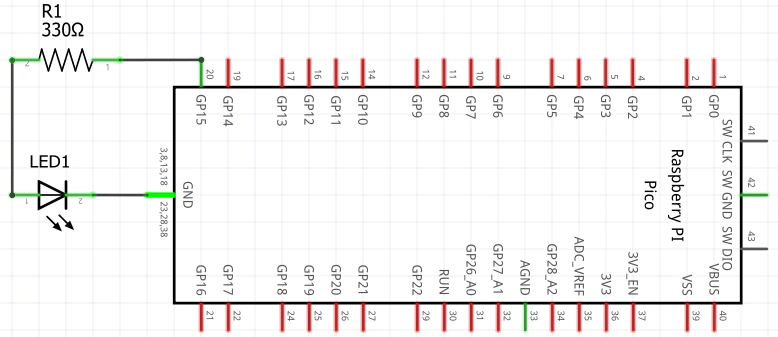
Circuit diagram
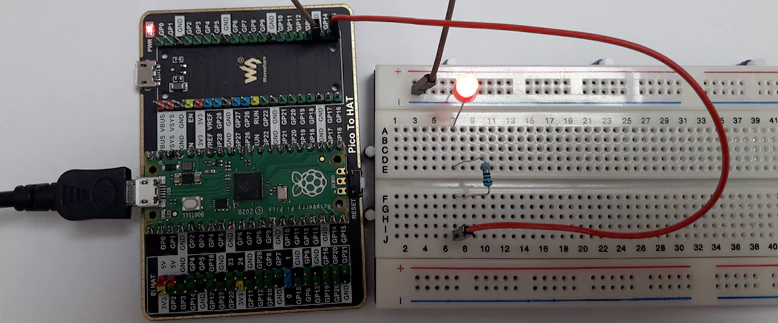
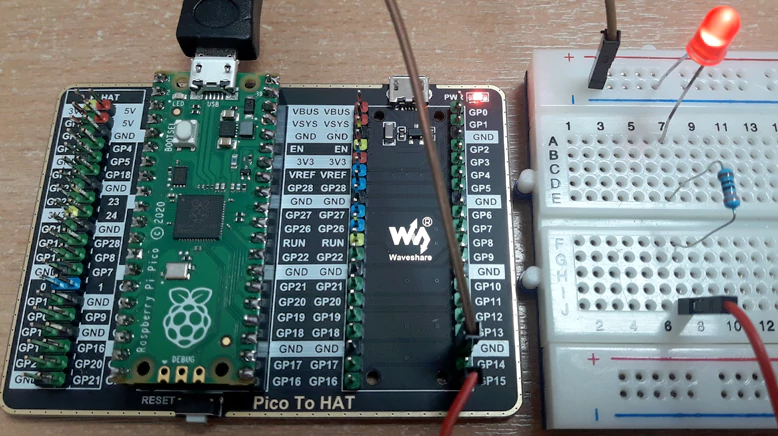
LED is connected to resistor and it connected to pin 15 (GP15) on Raspberry Pi Pico.
Code
Pin 15 is assigned to constant. We initialize a GPIO for specified pin using the gpio_init function. Pin is configured as output with gpio_set_dir function. Inside the infinite while loop, the gpio_put function turns on and off LED at a rate of 250 milliseconds.
project/main.c
#include <pico/stdlib.h>

int main()
{
    const uint LED_PIN = 15;

    gpio_init(LED_PIN);
    gpio_set_dir(LED_PIN, GPIO_OUT);

    while (true) {
        gpio_put(LED_PIN, 1);
        sleep_ms(250);
        gpio_put(LED_PIN, 0);
        sleep_ms(250);
    }
}
project/CMakeLists.txt
cmake_minimum_required(VERSION 3.13)

include($ENV{PICO_SDK_PATH}/external/pico_sdk_import.cmake)

project(myapp C CXX ASM)

set(CMAKE_C_STANDARD 11)
set(CMAKE_CXX_STANDARD 17)

pico_sdk_init()

add_executable(${PROJECT_NAME} main.c)

pico_add_extra_outputs(${PROJECT_NAME})

target_link_libraries(${PROJECT_NAME} pico_stdlib)
Designed circuit
Once project was built, the compiled binary myapp.uf2 was moved to the mounted drive RPI-RP2 and external LED start blinking.


Leave a Comment
Cancel reply