The bat is a tool that allows to display the contents of a file on the command line. The bat is similar to the cat command, with additional features such as syntax highlighting, Git integration, automatic paging, etc.
This tutorial explains how to install and use bat on Raspberry Pi.
Install bat
Connect to Raspberry Pi via SSH. Get the latest version tag of bat release from GitHub and assign it to variable.
BAT_VERSION=$(curl -s "https://api.github.com/repos/sharkdp/bat/releases/latest" | grep -Po '"tag_name": "v\K[0-9.]+')Go to your home directory and download the .deb package from releases page of the bat repository.
cd ~
curl -Lo bat.deb "https://github.com/sharkdp/bat/releases/latest/download/bat_${BAT_VERSION}_armhf.deb"
Install bat with command:
sudo dpkg -i bat.debWhen installation is finished, we can check version of bat:
bat --versionThe .deb package is no longer needed, you can remove it:
rm -rf bat.debTesting bat
Execute the bat command and provide file path as argument.
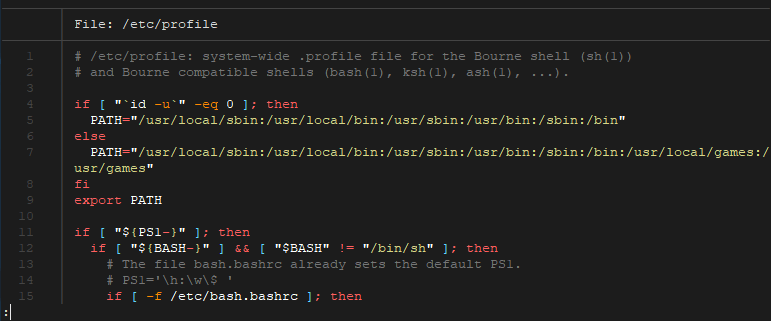
bat /etc/profileThe bat prints the contents of a file:

Press q to exit bat.
We can also display multiple files at once:
bat /etc/profile /var/log/daemon.logBy default, if the output is too large to fit on the terminal, the bat pipes output to a pager (e.g. less). We can use -P option to disable paging and print all contents of a file on the command line.
bat -P /etc/profileBy default, the bat prints contents of a file with decoration such as line numbers, Git modification markers, etc. Use -p to disable decoration and print plain content.
bat -p /etc/profileCommand options can be combined as follows:
bat -Pp /etc/profileWe can print a specific range of lines with -r option. For example, print lines from 4 to 8 (included):
bat -r 4:8 /etc/profileWe can skip first number and print lines from 1 to M:
bat -r :8 /etc/profileAlso possible to print lines from N to end of file (EOF):
bat -r 8: /etc/profileUninstall bat
If you want to completely remove bat, execute the following command:
sudo dpkg -r bat


The 1 Comment Found
Thank you! It worked perfectly on my Pi 3.
Leave a Comment
Cancel reply