
Lazygit is a terminal based UI tool for Git commands. This tool allows to view commit history, pull or push changes, resolve merge conflicts, checkout recent branches, and more.
This tutorial explains how to install Lazygit on Ubuntu 20.04.
Prepare environment
Before starting, make sure you have installed Git. You can read post how to install it.
Install Lazygit
Get the latest version tag of Lazygit release and assign version tag to variable.
LAZYGIT_VERSION=$(curl -s "https://api.github.com/repos/jesseduffield/lazygit/releases/latest" | grep -Po '"tag_name": "v\K[0-9.]+')Download tar.gz file from releases page of the Lazygit repository.
curl -Lo lazygit.tar.gz "https://github.com/jesseduffield/lazygit/releases/latest/download/lazygit_${LAZYGIT_VERSION}_Linux_x86_64.tar.gz"Extract lazygit executable file from archive to /usr/local/bin directory.
sudo tar xf lazygit.tar.gz -C /usr/local/bin lazygitNow lazygit can be used as a system-wide command for all users.
We can check Lazygit version:
lazygit --versionRemove unnecessary tar.gz file:
rm -rf lazygit.tar.gzTesting Lazygit
For testing purpose clone the Lazygit repository:
git clone https://github.com/jesseduffield/lazygit.git lazygit-srcNavigate to repository directory:
cd lazygit-srcNow run the lazygit command:
lazygitIn the left side we can see 5 panels: status, files, branches, commits and stash. Use the right and left arrow keys to move between panels. We can scroll up and down in right panel using Page Up and Page Down keys.
In the following example branches panel has been opened. In the right side we can see commit history.
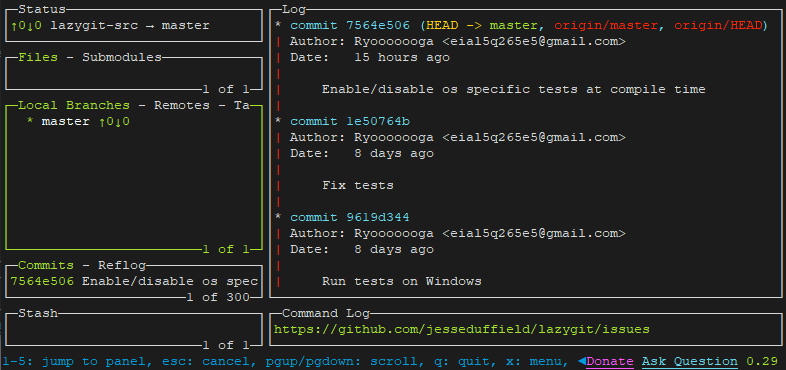
You can press Q key to quit Lazygit.
Uninstall Lazygit
If you want to completely remove Lazygit, delete executable file:
sudo rm -rf /usr/local/bin/lazygit


Leave a Comment
Cancel reply