The phpMyAdmin is an open-source administration tool that allows to manage MySQL and MariaDB database servers through a web browser. This tool enables to create, drop, alter databases, tables, columns and other objects, provides a way to manage users and privileges, allows to run SQL queries, import and export data using various formats, and offers other database management features. The phpMyAdmin is written using PHP programming language.
This tutorial explains how to install phpMyAdmin on Raspberry Pi.
Prepare environment
Before starting, make sure you have installed Apache HTTP server, MariaDB database server, and PHP.
Install phpMyAdmin
Download the latest version of phpMyAdmin from official website:
wget -O phpmyadmin.tar.gz https://www.phpmyadmin.net/downloads/phpMyAdmin-latest-english.tar.gzCreate a new directory where phpMyAdmin will be stored and extract tar.gz file:
sudo mkdir /usr/share/phpmyadmin
sudo tar xf phpmyadmin.tar.gz --strip-components=1 -C /usr/share/phpmyadmin
The tar.gz file is no longer required, we can remove it:
rm -rf phpmyadmin.tar.gzCreate directory for phpMyAdmin temporary files and make www-data user as owner:
sudo mkdir -p /var/lib/phpmyadmin/tmp
sudo chown -R www-data:www-data /var/lib/phpmyadmin
The phpMyAdmin provides a sample configuration file. Create a copy of this file named config.inc.php:
sudo cp /usr/share/phpmyadmin/config.sample.inc.php /usr/share/phpmyadmin/config.inc.phpUsing text editor open a configuration file:
sudo nano /usr/share/phpmyadmin/config.inc.phpBy default, phpMyAdmin uses cookie based authentication. Encrypted user password stored in a temporary cookie. This password is used to connect to database server. Find the following line in a file:
$cfg['blowfish_secret'] = '';Provide 32 characters long random string. For example:
$cfg['blowfish_secret'] = 'ZYdcrgJkEphDWgXAqU3vwGZAz44prJ4D';This secret passphrase will be used for encryption. Also we need to specify temporary directory where phpMyAdmin can store cache. Add the following line to the end of a file:
$cfg['TempDir'] = '/var/lib/phpmyadmin/tmp';Now we need to configure Apache. Create Apache configuration file for phpMyAdmin:
sudo nano /etc/apache2/conf-available/phpmyadmin.confOnce a file is opened, add the following content:
/etc/apache2/conf-available/phpmyadmin.conf
Alias /phpmyadmin /usr/share/phpmyadmin

<Directory /usr/share/phpmyadmin>
    Options Indexes FollowSymLinks
    AllowOverride None
    Require all granted
</Directory>
Enable the phpMyAdmin site:
sudo a2enconf phpmyadmin.confRun the following command to restart Apache service:
sudo service apache2 restartTesting phpMyAdmin
Get IP address of the Raspberry Pi:
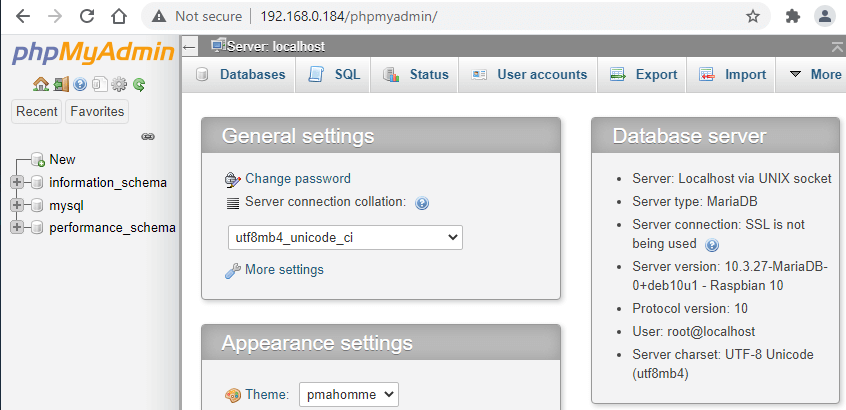
hostname -IOpen a browser and go to address http://<IP_ADDRESS>/phpmyadmin, where <IP_ADDRESS> is IP address of Raspberry Pi. Provide username and password to login to database server.
The phpMyAdmin will show message that configuration storage is not configured. Click "Find out why".

Click "Create" to configure phpMyAdmin storage.

Make sure your user have required privileges to create a new database and tables.
Uninstall phpMyAdmin
Remove phpMyAdmin related directories:
sudo rm -rf /usr/share/phpmyadmin
sudo rm -rf /var/lib/phpmyadmin
Disable the phpMyAdmin site, remove Apache configuration file:
sudo a2disconf phpmyadmin.conf
sudo rm -rf /etc/apache2/conf-available/phpmyadmin.conf
sudo rm -rf /var/lib/apache2/conf/disabled_by_admin/phpmyadmin
Restart Apache service:
sudo service apache2 restartWe can also remove database which stores phpMyAdmin configuration. Connect to MariaDB Server:
mariadb -u root -pRun the following SQL query to drop database:
DROP DATABASE phpmyadmin;Exit interactive mode:
exit


The 4 Comments Found
Thanks, very well written, concise and without useless excess rhetoric.
I followed all the steps and everything seemed to work until the end where I log in. I get the error on phpMyAdmin:
mysqli::real_connect(): (HY000/1045): Access denied for user 'root'@'localhost' (using password: YES)what is my username and password? help!
Hi, Roy
If you forgot your MySQL or MariaDB root password, you can reset it. Another option, reinstall MySQL or MariaDB. I recommend you to read a post how to Install MariaDB on Raspberry Pi.
Thank you for your instructions on phpmyadmin installation worked
perfectly today Oct 15 22
in the past the apt install didn't have the latest version which
caused problems especially on db saves ( didn't keep up with the php versions)
I'm helping a 96 year old with his website. At 79 two old guys still learning
Thanks again! no coffee of beer tip on this site?
Leave a Comment
Cancel reply